RADIO TOP 20 LIST
Poison Idea-EP demo
76% Uncertain-Estimated Monkey Time LP
Svart Framtid-1984 EP
Execute-A-Z EP
N.O.T.A.-Toy Soldiers EP
Broken Bones-LP
Slayer-Haunting the Chapel EP
Maniacs-LP
Die Kreuzen-LP
v/a-Great Punk Hits LP
Accused-Splatter EP
Instigators-Blood Tracks EP
v/a Anarchy-Violence LP
SSD-How We Rock LP
Electronaze-Waiting For EP
Stretch Marks-What d'ya See LP
Samhain-LP
Screaming Dead-Danse Macabre EP
Dead Can Dance-LP
v/a Cleanse the Bacteria LP

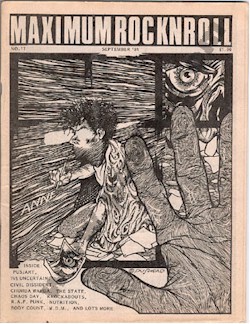
The Following is an article transcribed from Maximum RockNRoll,
Issue #17, September 1984
ARTCORE
A vast empty space which stands blank, that haunts in its untouched
perfection. Light reflects off the gleam of the eyeball in trance, by the
hypnotising effect that the pressed fibre delivers. Brainwaves bounce
from side to side, storming out creation in imaginary slices, as the motion
flows from inside the cranium at a speed beyond the believable to the forearm.
A hand grasps a utensil and slowly drops downward toward its destiny. The
fibre screams in fearful agony. Darkness sets down and scratches the surface.
Eye to hand coordination complete, the constructive process of creativity
slides across the smooth paper as the artist forms the art. What was once empty,
now fills with flowing scratches, designing dimensions and shapes, opening
light to dark, as the evolution see its patterns of structural progress. Finished,
the fibre lays destroyed, but the emotion inscribed upon it holds for all to glance
and provoke. The beauty of an idea composed upon paper.
Welcome to the world of graphic art. It holds many mysteries, pleasures and
frustrations. Your imagination builds the ability which you possess;
it is not a gift, but a talent that takes many hours to build. Anyone can
be an artist. It takes patience and endurance. Where other will quit, an
artist will observe, and take the talent to the surface of the graphic
fibers. An artist is a unique individual who lives and experiences life
like anthing else. We are all artists, only some express it with
dedication to the talent they build. Anyone can draw; everyone has an imagination.
The creativity will flow if you let it. Your confidence in yourself is
essential. Make your effort; feel what you can do.
Who teaches this drawing technique? Well, you yourself do that task. But
it takes inspiration from what you see. The sight that builds the imagination,
the confusion which seeks the answers. Before you met your first art teacher,
you had dabbled into the graphic realm. Whether you stenciled your fine art upon
the wall of your parents' room with those multi-colored crayolas (which I don't
think they taught you), to adding the colors to black & white figures you found
in books, there was activity in your hands to mold shapes, to capture
what your vision saw. Whether reality or fantasy, it was a desire to
graphically view your experiences. With the learnign to write, it came from
your ability to draw, thus this started your style. Style, which is your
personal reward. As you grew with this style, so did your experiences,
questions you couldn't answer or answers you found, became doodles which
reflected your observations. Perceiving other talents inspired your
inspirations, as your talent began to grow, while you grew. And what
your designs showed were the aspirations of your technique and how you
furthered them. Like the building of your style.
Basic drawing technique without the use of an art teacher can be found in
very individualistic ways. Learn How To books can help you in many ways
but can obstruct your vision since you are following someone else's
lines without feeling the satisfaction of seeing your style. Successful
interpretation of shape and dimension comes from long practice and patience;
you can't expect it as first. You will understand as your style progressesa
with your maturing of the talent. Photo magazines or comic books show you a
very necessary way to learn since you can copy what you see. Whether a
photographic face or a superhero's muscles, it will show you a very close
way of getting the proportion down right. And with using your own human
structure as a model, you will learn the anatomy of body shapes in a graphic
way. A bad point would be to completely copy another artist's design.
Leave room for your own input in your learning process. It is all trial
and error; you cannot expect to draw like them, even when you are copying
their lines. Where is your creativity? Using another artist's work as a reference
is helpful but remember your style which you're forming. It is not theirs;
they have their style, you need yours. Looking at 'live' objects and also
photographsof those objects helps you form the right proportions so it
will work successfully. Once you feel you've gotten the knowledge, it
will come naturally and your sketching will reflect your teachings
without seeing the references. That will be the first step of your
pride and style. Remember to use copying as a form of learning, NOT
to lay claim that you are an artist. When you have the flow of how
your drawing functions without the references, take your ability to
new shapes. Take the human body for example - draw it from all sides;
with movement, all the aspects of the contortion or the relaxation a human
frame will endure. Seperate it into individual area; arms, hands, faces,
legs, torso, and so on, drawing it like it was on a platter turning in 360
degree revolutions, getting all aspects of the shape. Remember one very
important fact; always get the thumb on the right side of the hand. When
your palms are out, the thumb points outward; when the knuckles point out,
your thumb points inward. Forgetting this is a very common mistake. Whether
you're drawing the human body, animals, nature, architecture, comic
characters, etc., etc., make sure the interpretation is correct. Even
in fantasty there are balances. You will find all the right answers for
for how it all comes together witht ime and continual drawings. You cannot
be an expert if you do not draw. There are no rules in graphic scratchings,
but you will make rules toward your style. These are not limitations,
these are just procedures of what you see and do. Once you have the
total feel of what you are doing, it does not mean the complication will
end. This route is what keeps it moving, so you develop the methods.
Material techniques, or what to use as far as supplies go. Well, that
breaks it down into a large field, and you will determine what works best
for you. Your basic pencil and eraser are the most commonly used objects;
for when there are mistakes, there is help to correct the problem. A pencil
flows nicely, never needs to be refilled, can be dark to light depending on
pressure, so that makes it food for shading. A pencil is also lead and is
never really solid on a piece of paper, so it will always smear, making way
for the eraser's help. pencil illustrations are very griny, but with glistening
results. A spray amtte finish helps to preserve the textures accomplished.
As far as reproduction goes, it can be a problem, the ebst way is to get the
illo halftoned, which is a photo process that breaks down the pencil work
into millions of dots, just like a photograph. Another way is to ink your
penciled lines. That brings you into the field of black and white, where
shading comes from designs, not smudges. When you pencil your rough for
inking, do it in either lead pencil or blue pencil. Blue isn't picked up
when it is shot for printing. Lead lencil lines can be noticeable when
printed, so you might have to do some erasing when you ink to rid
yourself of your rough pencil lines. It is your choice though
because you can get certain functions with a lead pencil that
you can't get with a blue pencil, and blue is harder to see
since its image will come out light. You're about to ink your rough
illustration; what do you use? Well, you could have done the whole thing
in felt tip pen and gotten a fairly decent reproduction, but if water
was accidentally spilt on your illustration, there it goes, it just bleeds
away. This is very frustrating. It is wise to use and india ink. True, you
can get very tasty effects from a felt tip pen, but that comes with time.
Experiment with it as you go. A felt tip pen makes good slicing lines and,
with practice, adds a smooth style with each scratching. They are worthwhile,
but the water element does have its destruction on the final lines. There
are also 3 other major methods more widely used in the major field that work
and last the best.
The 'dip' ink pen has multiples of different points to use, where you dip the
pen into the bottle and draw until its time to re-dip. The benefit here is
the points or tips you use, with these any variety of shape can be achieved
just by changing the tip and the stroke you take. The ink pen is very difficult
to master, but works wonderfully when successful. Give it time and be patient.
The brush is perhaps the ahrdest to ink with when you're first learning, but
once amstered, this tool creates all the lines at an effortless pace. Fast
and smooth, the brush talks with your performance, adds to your style-for your
style controls how the lines are accomplished. A lot of patience is needed with
a brush in the beginning.
And lastly, what is slowly becoming an artist's tool of creative rendition, because
of its effortless use and the taking away of the messy ink bottle (which is
necessary for the ink pen and brush) is the rapidograph. It's an engineers tool
designed for work on film and other hi-tech graphics. THe rapidograph is a
very delicate instrument that cannot be abused. It contains a very small, long
hairlike steel point encaged in a tubular shell, which is housed in a plastic
fitting that has an ink cartridge attached. All that is required is the filling
of the cartridge for continual usage. But cleanig fo this tool is required to
prevent clogging, which happens, especially when the usage fo the wrong kinds of
paper. Standard paper is a hazard to rapidographs. You can write on it alright,
but the steel point rips the paper when you draw, thus picking up the pressed
fibres--and up into the tubular shell they go, slowly clogging it. That is why
it's best to find a very smooth (like film) surface to illustrate on, such as
a high gloss, bristol board. The rapidograph is also used with interchangeable
points, but they are only for thickness--not textures and shapes. You can create
your style with the pen, but using combinations of all these drawing utensils
helps provide thickness, shading and effect. Choose your possibility. Using an
india ink can also create some problems, since once down, it cannot be erased.
White out will cover it though. Again, trial and error teaches you about ink mistakes.
Sharp etching tools can also help.
Then there are also other methods widely used. Scratch Board is where you ink your
illustration and then use an etchign tool or similar device and scratch new lines
into the black areas, giving new effects. Also, scratch boards can be fully inked
and then you can use your etching tool and draw as you scratch. Charcoal is also
fun, like pastel crayons. But both are not solid on your paper, and smudge. But
erasing these tends to be harder than pencil. The effects from these are unique,
especially when used in a crowquill paper. Types of paper to use varies with the
effect you search to achieve. From standard paper to high quality bristol board,
one will work. It takes experience with testing of the different textures.
With using a black & white medium, how do you make greys? Photographs have greys,
or do they? It is all balck & white dots, just spaced accordingly to form the
right shade. It works the same way when you illustrate. you can use lines, dots,
circles and many other different ideas of textures to acquire what you desire.
Shading, when done properly, adds a strange dimension to the work. Black & white
shading can be very time-consuming. But don't let that stop you. You can also use
washes to do shading-where you bleed the black ink in water to get the grey tint,
and then brush it on. This effect works good, but for reproduction, the illo must
be halftoned to bring out the tint. And there is also a plastic film called
"zipatone" or by various names, where you can buy pre-made textures and shades,
and cut them to your designated position and stick or rub them down giving a fast,
simple way to shading. There are hazards to this, but experience with it helps.
All in all, it is important to use good black and white combinations, including shading.
Always look at your references for inspiration and help. The white blank syndrome
can always hit you; it's up to you to create the full product.
Now, you have completed your masterpiece and you wish to have it see print.
But what are you going to do? First, there are no guarantees that your work will
be used by any medium. But that doesn't mean you can't try. Your confidence and
ability will see it flourish. Never send out your original artwork. What you do
is find a place that makes photostats. It isn't that expensive and is a value to
your original artwork. Make copies of your work for your collection and other
soliciting purposes. Then you wrap your original up, preferably in sealed
plastic and store it well, unless you frame it. Take your photostat of the
piece you made, wrap it in palstic or foil, then surround it with cardboard
so it won't bend. Take a copy that you've made and enclose it with the letter
you've written to who you are soliciting, for their records. Enclose return
postage and a SAE so it can be returned to you if not used or after using.
Package the whole thign up and mail it first class or higher if necesary
with "Do Not Bend" in red on the front. Make sure you specify if your work
is published that you receive a copy off the press. It will take a lot of
time to get something published. No matter how good your talent, it up to
you to sell it. Don't wait around for people to ask you to draw their
piece. Until you've sold yourself in what you can illustrate and have
something to show, no one will take interest in your talent. It's up to
you to prove your existence. Build up your portfolio to exhibit when you
get that potential client. Make sure when you send out your samples and
each one is labeled with your name and address, so they can contact you.
Who do you contribute to? That depends on you. There are fanzines, bands,
fliers needed to be done, and magazines, comics ad firms, individuals, logos
and a lengthy list that you must investigate. A good start is offering to do
a flier or a gig poster for a band. Do not expect to be paid. Don't let your
greed get the best of your work. You need the exposure. Until you do get to
a certain point of exposure, don't expect money. You're helping them, but
they're helping you too. Time will make its judgements as to when it's time
to reap rewards, and don't overdo it either. You have talent, but don't let
that talent get a big ego. You must be able to sell your talent, not in a
monetary way, but in a productive way. Rely on yourself, not others. You
create, you continue. Don't give it all to someone else to deal with. Be secure in
your accomplishments. Share with otehrs and you will learn more about your talent.
Continue the progress of your illustrating. Don't stop when you reach
the rich and famous. Enjoy your ability and help others. Then you will feel the
real success of your talent, the full exhiliration of accomplishment.
Here is a short representaion of artists who form the new "underground".
Some will call them "punk" artists, and others might say "horror" artists. But
what is here is some new rising talent. Not all of it is presented, and no
favoritism is intended; just artists with styles that are young with potential.
Give them, and all rising artists the chance to further their skills! The
evolution of the underground artist is one of growth, from Rick Griffin, Kelly
Mouse, to Berni Wrighton, Jeff Jones-all in different areas, each who went to
different mediums and are successful at what they do with still growing talent.
The so-called "punk" artist has grown at numerous rates, furthering his skills
with thoughtful and satiric nature, all with a skill and a desire. Perhaps you
could be next.
Beware of ripoffs who abuse your artwork without your permission. There are
rights you, as an artist, hold. Copyrights can eb obtained, and when
signified with each illustration, hold a lot of ground when someone is
profitting from your work.
Myself, I would like to say thank you to all who have supported my efforts.
It has been the best of fun to be able to create and inspire others.
During the period of my involvement, I have seen happiness and stress.
Sometimes it knock's you down, and sometimes brings you up. The work
schedule I am under now is quite humongous, but I will complete it all,
and continue. I have seen major losses, but felt joyous gains. Staying
dedicated to what I set out to do has kept me towards the best of my
security and graphic ability. I have learned in places I thought I would
never see. I am grateful that it continues. This is only the beginning!
Take utensil in hand and be creative. The reward is yours. Make an effort.
Show your hardware. All the best!
The Following are the reviews from Maximum Rock N Roll #17
September 1984 as submitted by Pushead.
Various Artists-"Blazing Wheel and Barking Trucks" LP
Cowabunga! Volume numero two of "Skate Rock" slashes the vinyl
terrain with some surfy-punky-metally-rocky sounds. None of this
is thrash-it's straightforward noise by J.F.A., the FACTION, McRAD,
TSOL, ANVIL CHORUS, the KINGPINS, BORSCHT, the BIG BOYS,
and more. Fun, enjoyable stuff enhanced by good recording, but keep it
for after the skate session. Good job, Mo!